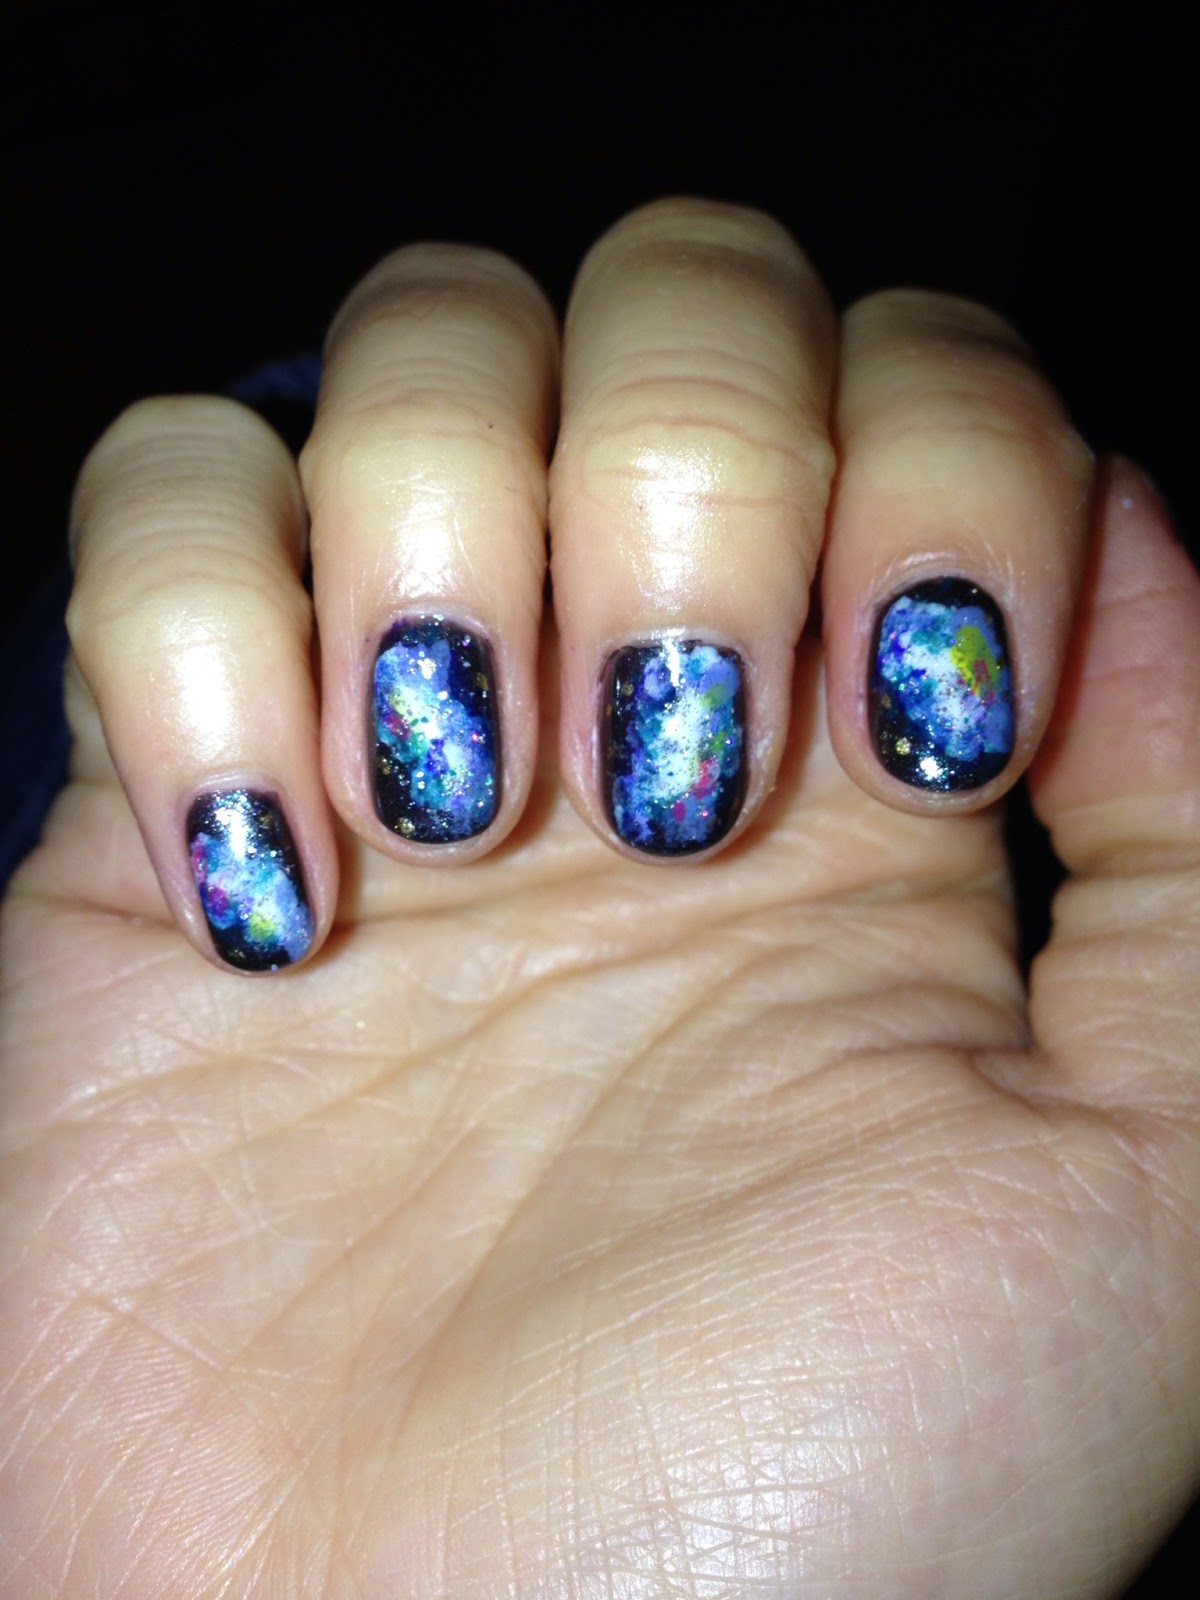
Okay, so I have seen a lot of different takes on Galaxy Nails and have always been intrigued by it, but also a little scared to try it myself as it looks so complicated!
But after a lot of chin scratching (lol) I decided enough was enough - it was time to take the plunge.
The beauty about this look is that it really is what you make of it, you can use what ever colours for your galaxy that take your fancy and also, the outcome will be very unique compared to everyone else's, unless you follow their attempts to a T, even down to what products and tools they use.
For me, I wanted to do it my way, as in, taking inspiration from other people's attempts and recreating the look using the tools I had without having to go out and buy anything new (cheap and cheerful!).
To start, I chose the nail paints that I wanted to use and then after applying a clear base coat, I applied the base colour (2 coats, allowing each one to fully dry).
The colour I selected for this was a dark metallic grey colour called 'Intense' by Collection 2000.

Galaxy Nails - preparation

Next is the fun part - creating the galaxy! This requires a lot of patience and a steady hand. I chose to use cotton buds to help me create mine. You can use a bit of sponge (tear up a cheap make up sponge or something) but all I had at my disposal were cotton buds so that is what I used.
First of all I dipped a bud into my pot of white Barry M nail paint then smudged it onto each nail in a kind of S shape fashion almost and then allowed it to dry. I then took another bud and dipped it into a dark green No7 nail paint and smudged that on top wherever I fancied (you can allow your artistic side to take over) and then allowed that to dry too. And you carry this process on with the colours you decide to use until you are happy with your end result.
Don't worry if you make a 'mistake' - the aim isn't to make every nail look the same, if you keep starting afresh every time you feel that you have made a mistake you will end up taking forever to paint your nails! Just keep on going and you can always mask slight slips with the next layer and colour of polish that you choose to use.

Galaxy Nails - a bit like arts and crafts

To really bring it to life, add some 'stars' by dotting some gold nail paint around each nail (I used my Andrea Fulerton nail art polish for this, bought from Superdrug) and then paint some glitter paint on top of each galaxy to make it sparkle. I didn't have any glitter based clear polish so I roughly smeared a little clear polish on each galaxy and then sprinkled some holographic nail glitter dust on (so that it would stick) before I applied a couple of coats of clear top coat over the top, allowing each coat to fully dry.

I love the finishing touch of applying the clear top coat because it really seals in your hard work and also brings in all those layers of polish into one, giving it a very lovely shine and look. I use a diamond shine Sally Hanson top coat - it works wonders on painted nails, but be careful not to apply too many strokes per coat else you risk smudging your hard work as it is quite a powerful varnish.
Overall, I had a lot of fun creating this look and can't wait to give it another go again, with some other colours!

Time to admire my Galaxy Nails


Have you tried this look before? How did you do yours?
lvy <3
No comments:
Post a Comment